Luffa plant
Luffas are a fun plant to grow, but they do come with their challenges. They are recommended for growing zones 7 and higher (but I grow them in 6b) and thrive in the heat. They are part of the cucumber family and are eatable if you harvest them when they are green. Research tells me that they taste more like a zucchini and you can eat them raw in salads or cook them for stir-fries and soups. If you let the dry out on the vine like I do, they turn into a natural loofah. For today, we’re going to talk about harvesting them in the later stages for this purpose.
You’ll notice that there are two spellings on their name. The LUFFA spelling is used when talking about their seeds or green vegetable (it’s the scientific plant name). LOOFAH refers to the natural sponge they turn into when dried.
When growing these plants, especially out of their growing zone, they’ll need a lot of care. They are recommended for growing zones 7 and higher. They take a long time to grow from seed to harvest, and they need temperatures 70F and above. Anything colder will stunt their growth and likely kill off the plant.
How much time does it take to grow them? 120 days, plus time to allow them to dry out on the vine. Here in Northern Ohio, our growing season is roughly 120 days, so you can see why it’s not recommended in our area. So how do I grow them? and how can you?
I start seeds indoors and then transfer the young plants to my greenhouse. Every February I get the itch to start gardening, and these are the perfect plants to start then.
Here’s my timeline:
Feb-March: Take seeds and place them onto a damp paper towel, fold it over, and put it into a ziplock bag. Place near a window and forget about it for two weeks.
After 2 weeks, plants should have started to grow roots and emerge from the seed.
Put each emerging plant into its own 4” or large pot with soil and lightly water.
Place in front of window indoors, or in an area that maintains 65 degrees F or higher.
Water lightly when soil looks dry.
Once the plant has established its first set of large leaves, it can be moved to a temperature-controlled greenhouse. If you don’t have that, you can keep it indoors with enough space to grow.
After a couple months, the plant will want to trellis. Place a stake into the pot to allow it to grow upward.
At this point, it might be easier to place the small container into a larger pot to trellis. *Do Not remove plant from initial pot at this stage.
Once the outside temperature maintains 70 degrees Fahrenheit, you may transplant outside.
Dig a hole large enough for the plant roots and surrounding soil to sit in. Gently remove from pot. The least you disturb the plant and its roots the better. Cover with soil and carefully wrap vine onto trellis or attach stake onto trellis to guide the vine. Water lightly and say a prayer.
If the temperature overnight dips below 70 F, or if the soil you’re planting into isn’t warm enough, the plant will stall. Again, the less you mess with it, the better. Even if it looks like it’s dying, give it time. Make sure to continue to water it and keep an eye on it. I’ve had luffa plants in the past that looked like they were dying. I left them alone & they started growing again.
Where do you find them? You may get lucky and find luffa seeds at your local nursery or grocery store. Some of the popular seed websites have them to purchase as well. If you’re near me, my farmstand has them avaliable and next year I’ll offer shipping on seeds. You can also purchase plant starts of Luffa’s up until your last frost date, but they’ll be difficult to find. Most nurseries won’t carry them, especially in our area. I sell plant starts at my farm as well & have been inundated with orders.
How to harvest:
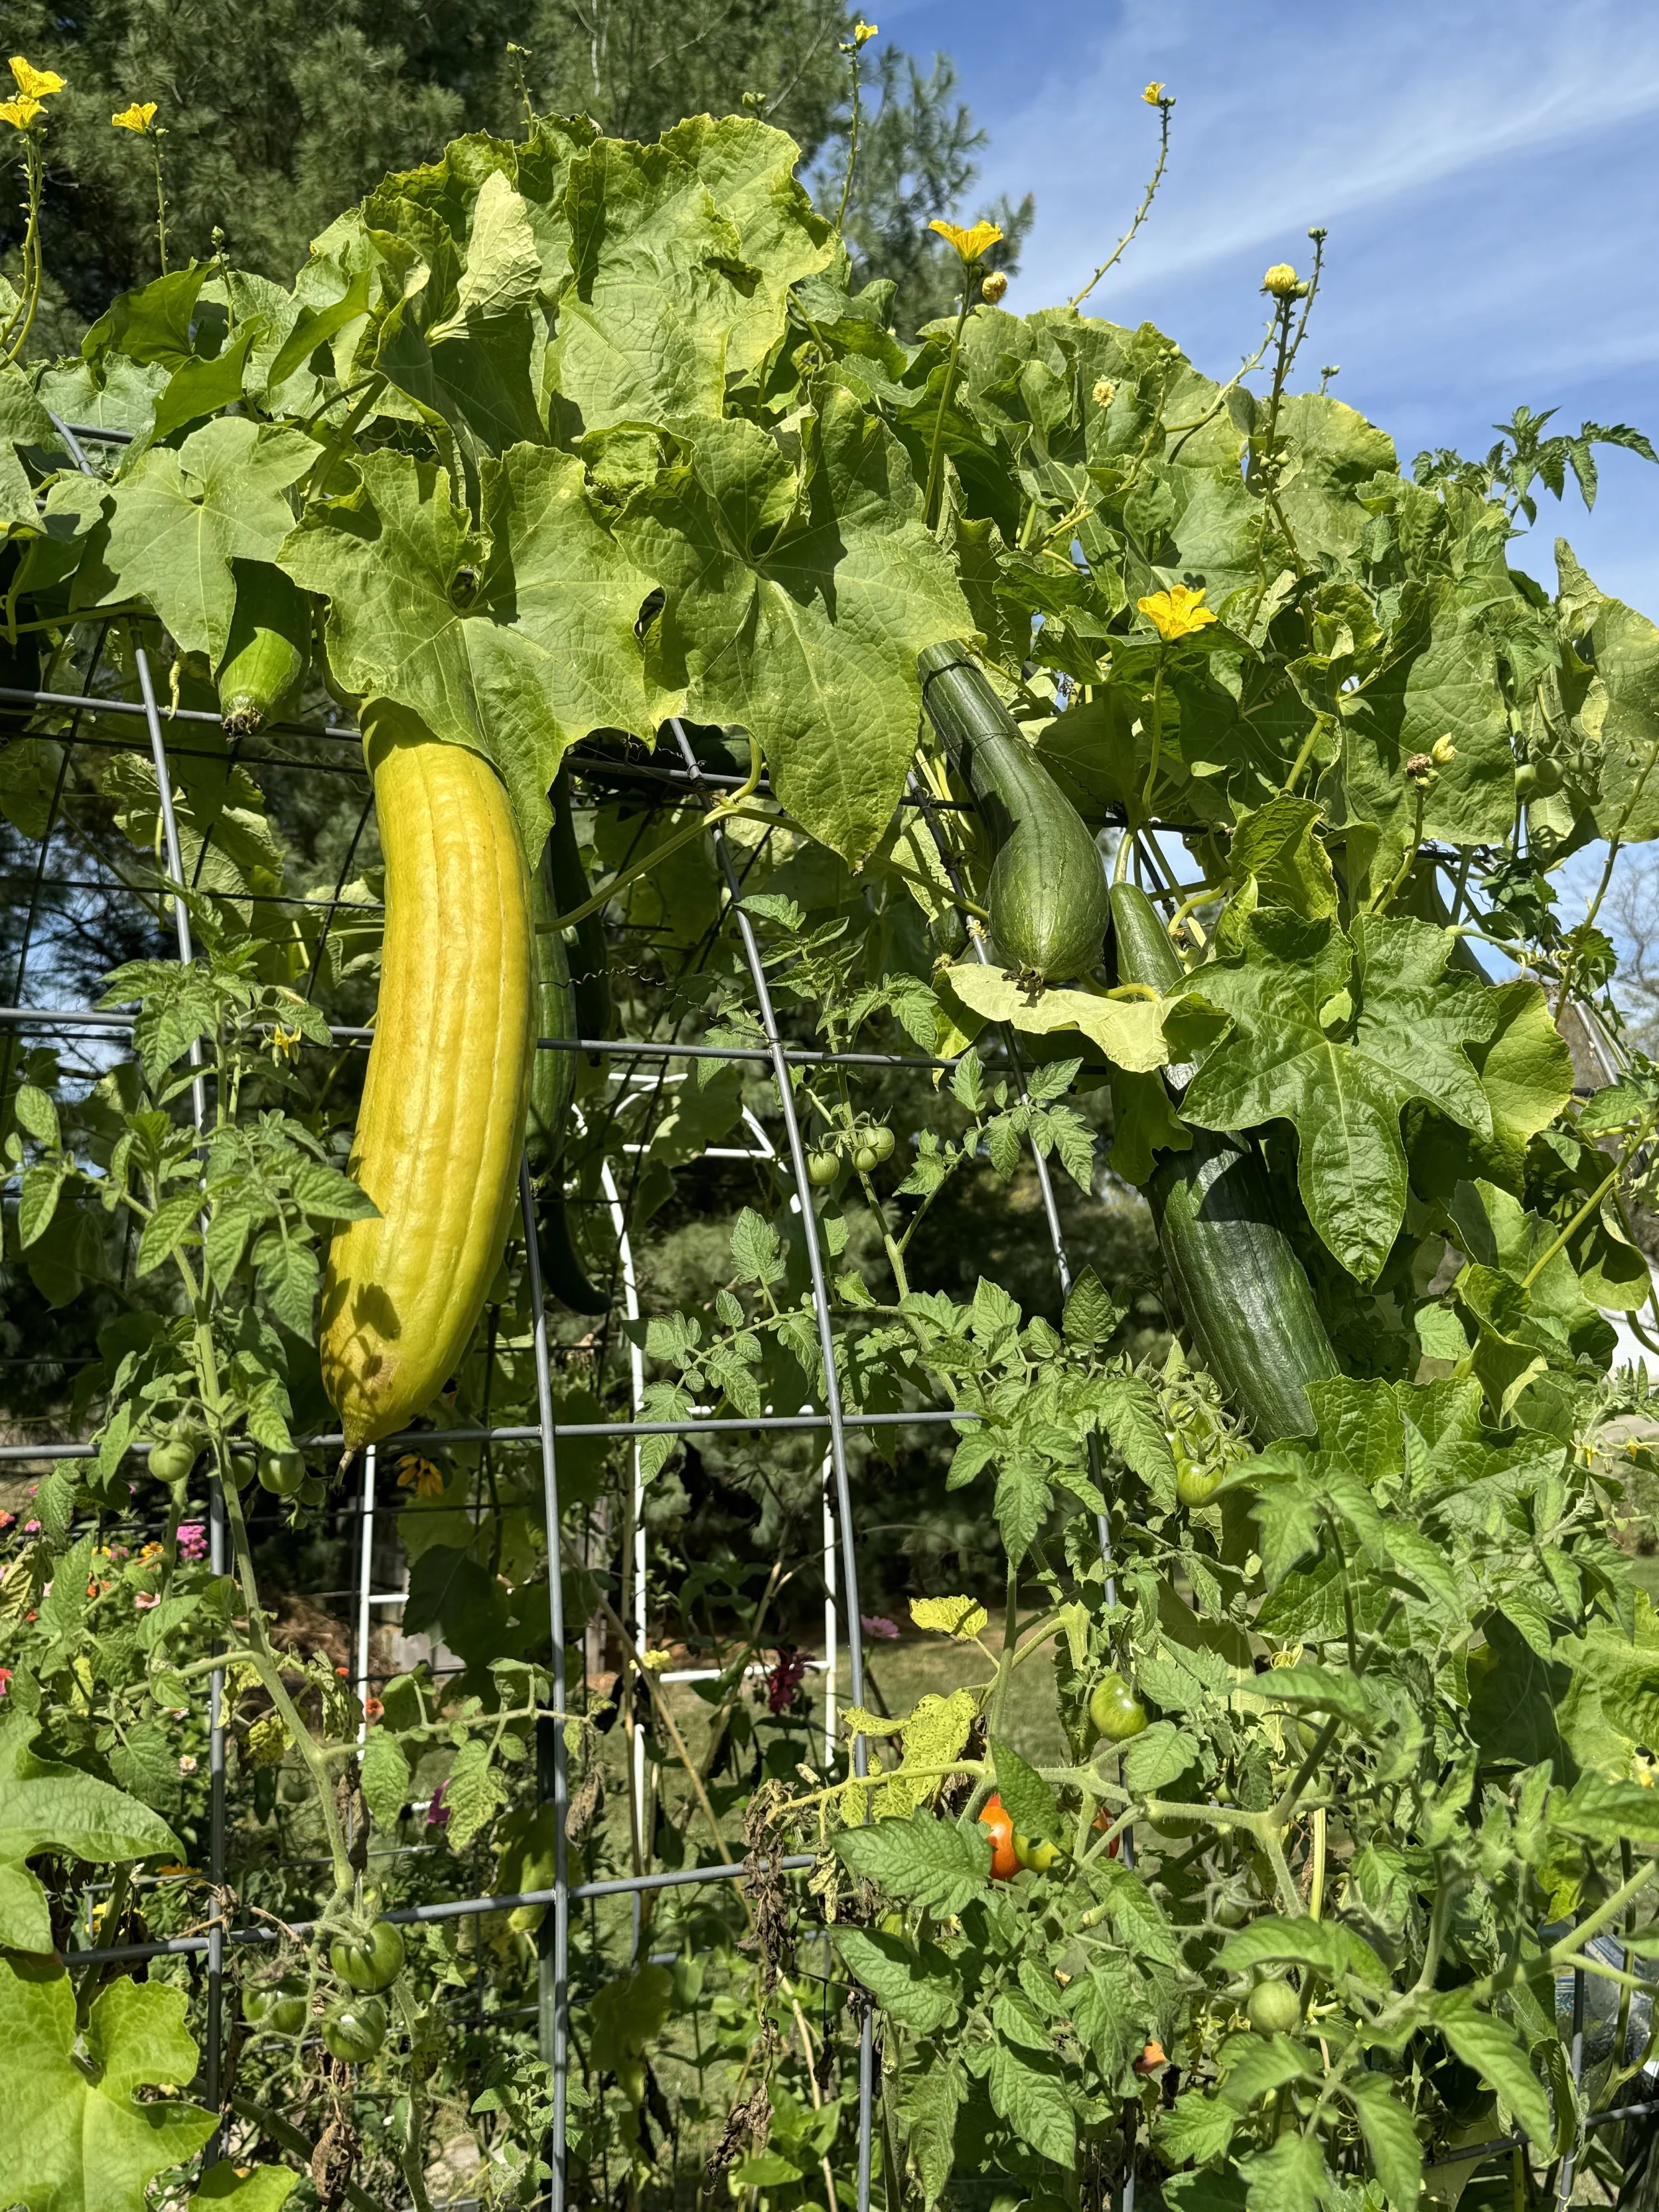
By late summer you’ll see luffa’s starting to grow on the vines. They’ll be very large and may need extra support. I just position mine so that the trellis is holding the luffa’s weight.
They’ll start off a dark green and then fade from yellow to brown.
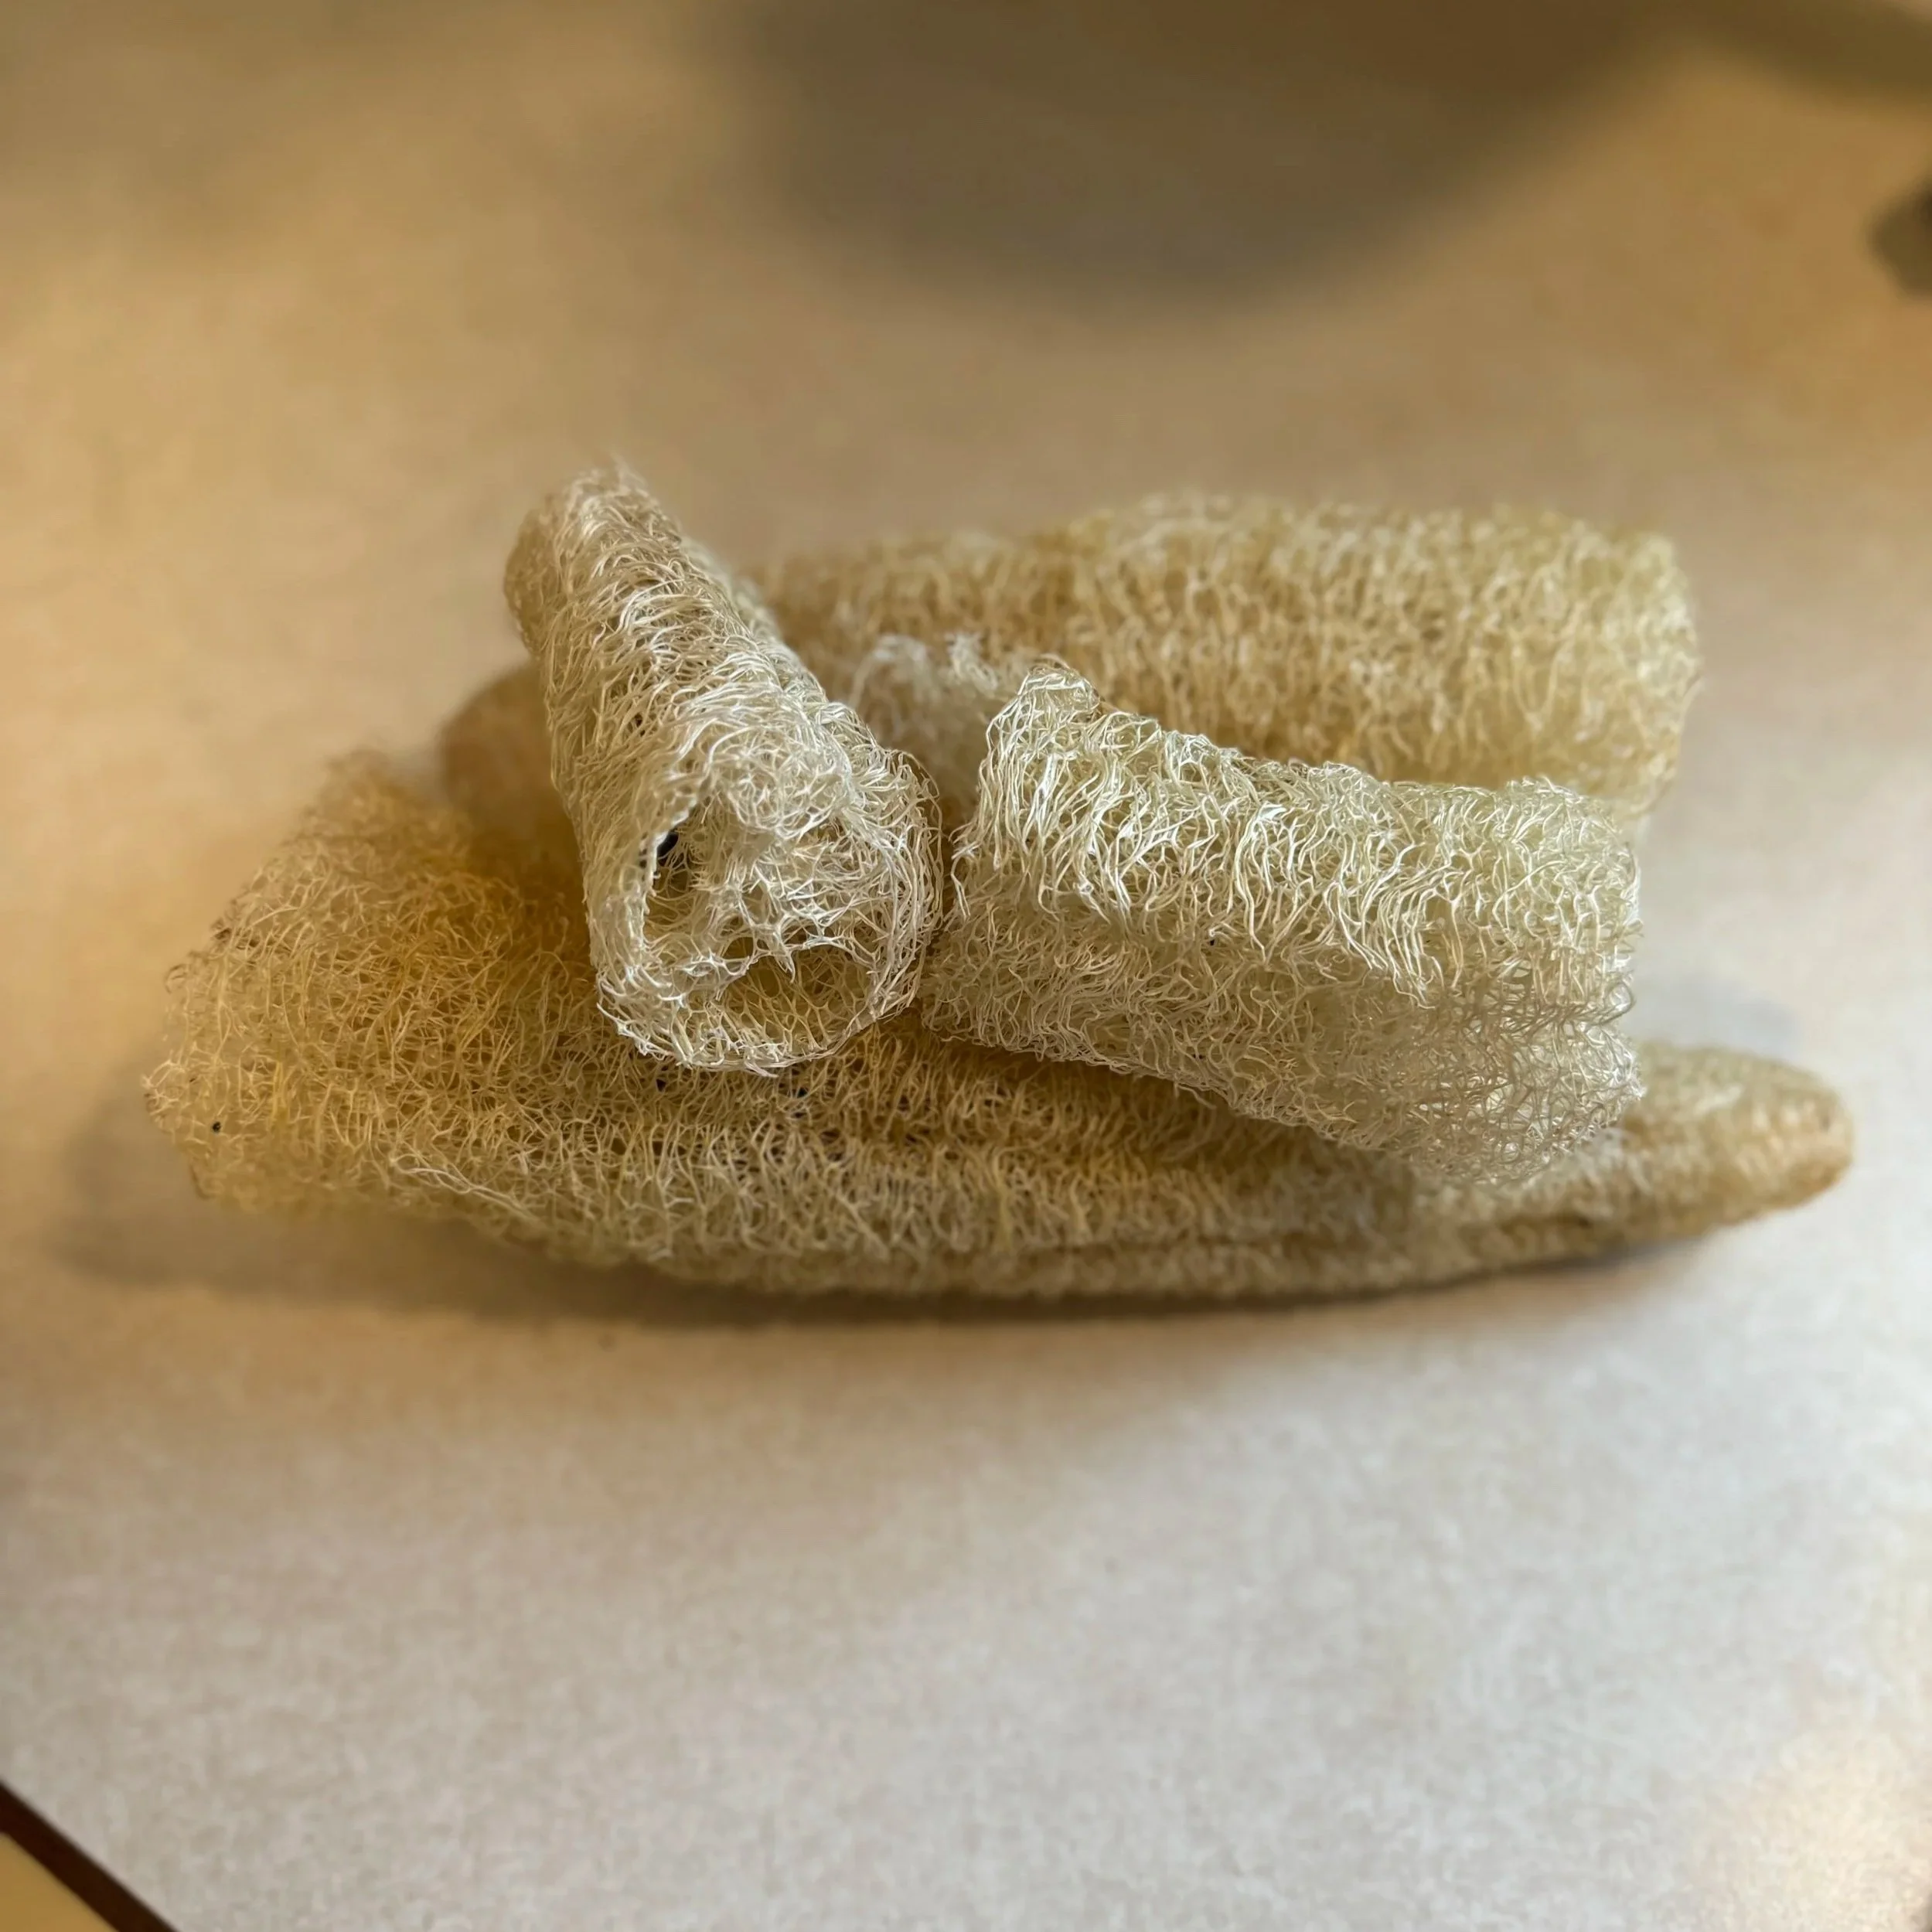
The best stage to pick them at is brown. This makes less work for you and it’s a lot easier to peel, clean, and remove seeds.
Yellow is the next best stage to pick. If you pick them at this stage, they will still be holding onto water. I have harvested them yellow before and they’re a little more work. The outer layer of the luffa will be tough and that makes it a little harder to peel. When cleaning you’ll have to squeeze the water out of them and that can be time consuming.
The only time you would harvest luffas at the green stage is if you’re picking them to eat, OR if your first frost date is rapidly approaching.
Green & Light Yellow colored luffa’s that must be harvested due to impending frost can be dried out indoors infront of a window. I’ve also been told you can dry them in an oven. I’ve tried that technique once before and failed, so you’ll need to do your own research on that.
Clean Loofah & Save Seeds:
Peel off the outer layer and reveal the sponge inside.
Place a strainer or paper towel into sink to catch the seeds while washing the loofah with water.
After it’s rinsed, shake out the rest of the seeds. Do your best to get them all out, they are loaded with them.
Let them dry out on a towel until it feels like a hard sponge.
Store in cool, dry area.
Seeds: lay seeds flat onto paper towel and pat them dry. You can also let them air dry overnight. Store full dried seeds in a breathable seed packet. Store in a cool, dry place. *seeds are naturally covered in a protective layer, which resembles thin tissue paper. When you remove seeds the following growing season you’ll see them. They can be discarded
Good Luck growing your Loofah’s & please share your results and tag our farm on social media. I’d love to see your loofah’s you’ve grown!
Happy Planting
Dried Loofah Sponge
Drying out on the vine

Luffa Seeds & Loofahs